
This article explains the primary reason for high disk utilization on the Synology NAS. In this example, we’re using the Synology DS720plus model. It has a 2 disk RAID1 configuration. The disks are 3.5 inch mechanical disks that honestly aren’t that great to begin with. Coupling that with the Synology insistence on high disk IO for (what would seem like) normal NAS-type work makes for a bad combination.
Take a look at this screenshot:

You can see the resource hog is the “Universal Search” process and the “fileindexd” child process. The fileindexd process is the killer. But there’s more as we’ll see below. But why is it running? As the name would suggest, it’s indexing our files to improve search speeds and generally make findings files (by anything or anyone searching for them) faster – more efficient.
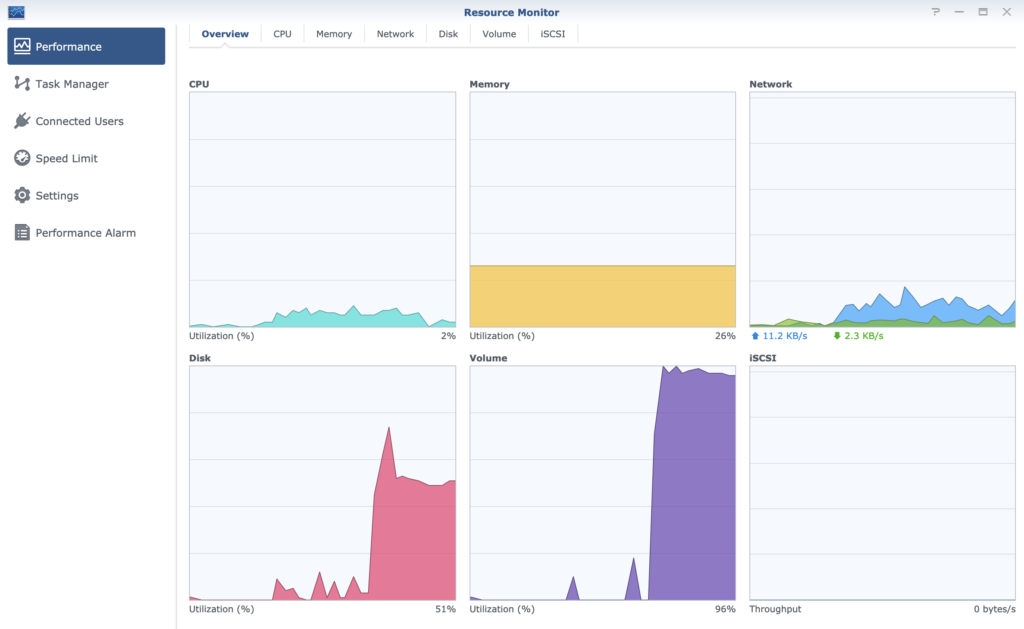
Look at this graph:

It’s showing the “disk” and “volume” utilization is extremely high. This is ongoing. It doesn’t seem to ever stop. Like I said in the intro to this article, the disks aren’t particularly good which would absolutely be contributing to this high utilization phenomenon.
If indexing was the only issue, we would expect that, if the contents of the disk have been successfully index, then only minor indexing would be needed moving forward. But the indexing seems to go on forever (at least, a long time). So we need to consider there is more than one thing contributing to the high disk IO.
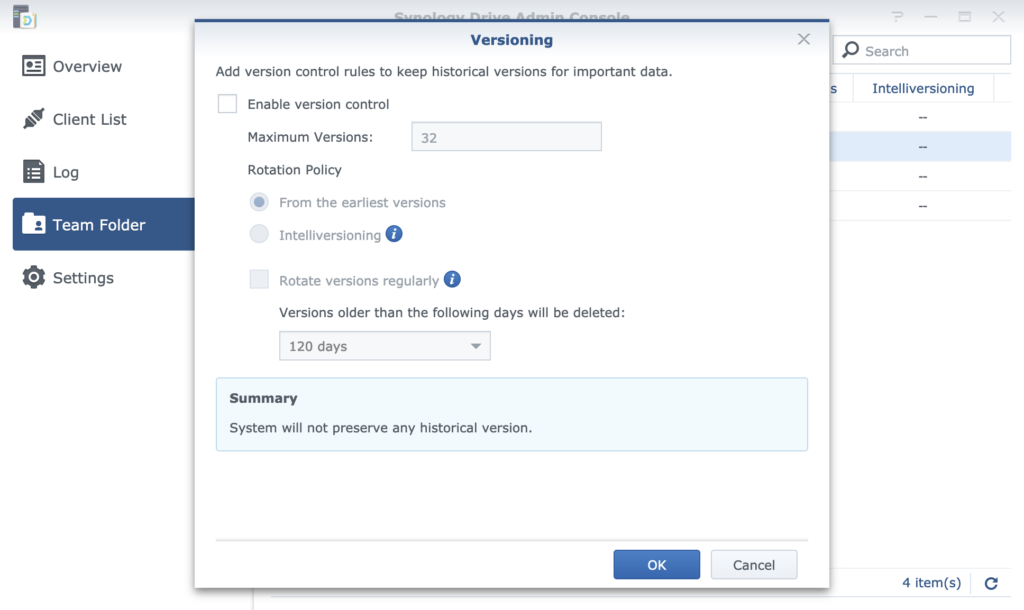
Let’s take a look at the version control settings:

You can see the version control is enabled. It has been set to 3 (retention). This defaulted to 32 (the maximum) but as a test, I downgraded it to just 3. It didn’t seem to make any different to the high resource utilization. In other words, 1 version retention versus 32 version retention doesn’t seem to make a different.
Here’s where I theories that the issue is a combination of enabling version control at the same time as enabling indexing on the same data. The data is changing throughout the day, versions are being added and removed (entering and leaving the retention limits) and that’s causing indexing to continue for ever.
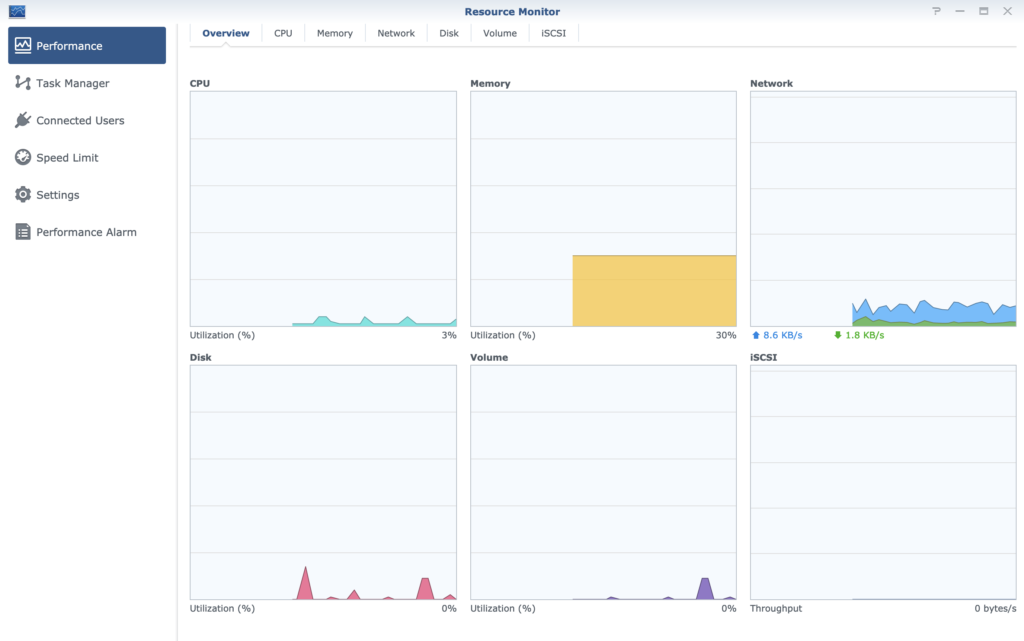
To demonstrate my theory, I have disabled version control as you can see here:
I revisited the resource manager to validate my change. However, the changes don’t come through. In fact, the re-indexing process continues to use high disk IO. But that makes sense. I only disabled the version control, not the index process.
You can see the indexing status is still “Indexing”.

So the next thing to do is disable indexing. I couldn’t find a nice way to do this. I resorted to un-cool means. I SSH’d into the NAS, located the process ID for “fileindexd” and killed it. Actually, I had to move that program asside and then kill it – to prevent it from auto restarting. Take a look at the result in the screenshot below:

You can see the results are excellent. But it’s not the right way to achieve it. Obviously disabling a process by moving it and killing it is not the right way. So I moved the process back.
I turned version control back on. I set it to 3 versions retention. This is the effect:
The results speak for themselves. But here’s my summary. The indexing process is the killer. But it’s compounded by having to deal with version control.
I decided to leave it for a while in the existing configuration of 3 version retention and indexing enabled. I’m glad to see that it eventually (for the first time that I’ve noticed) calmed down to a sensible level. Interestingly, the disks still make plenty of noise (again, cheep disks) but the Resource Manager reports negligible activity. See that screenshot below:
And for full disclosure, here’s the indexing status (below) that matches the resource usage above:

So what’s the solution? Either disable version control and indexing, wait and hope it finishes the indexing within your life time, or get faster hard disks.

I am having this exact same problem can we talk?