This article shows how to configure the Synology NAS and UniFi switch to use multiple ethernet connections to increase speed. In this article, we’re using two Ethernet cables, but more is possible too.
The hardware used in this article are:
- Synology NAS DS720+ running DSM 7.2.1-69057 Update 5
- UniFi US-8-60W running 7.0.44
The Synology should be configured first. You’ll be disconnected from the NAS while the configuration process is taking place. When done, network connectivity will return, obviously.
Start by ensuring there’s two network cables connecting the Synology NAS to the UniFi switch. Make sure the network switch ports are consecutive (next to each other). If not, you’ll have trouble.
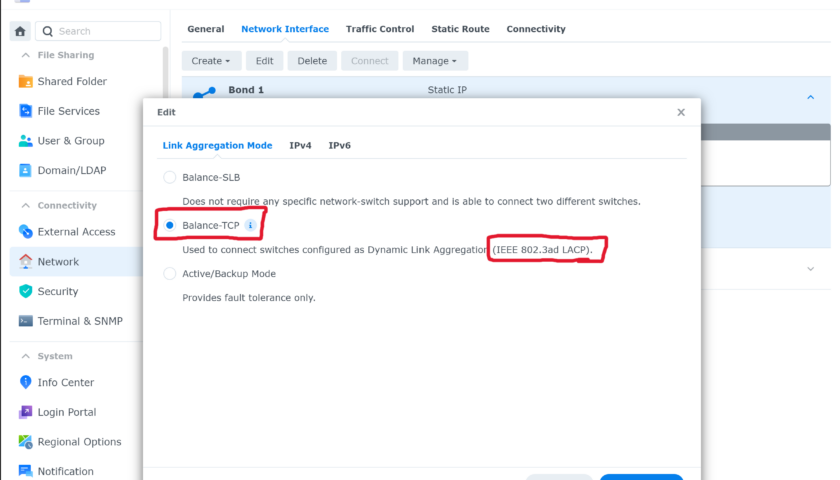
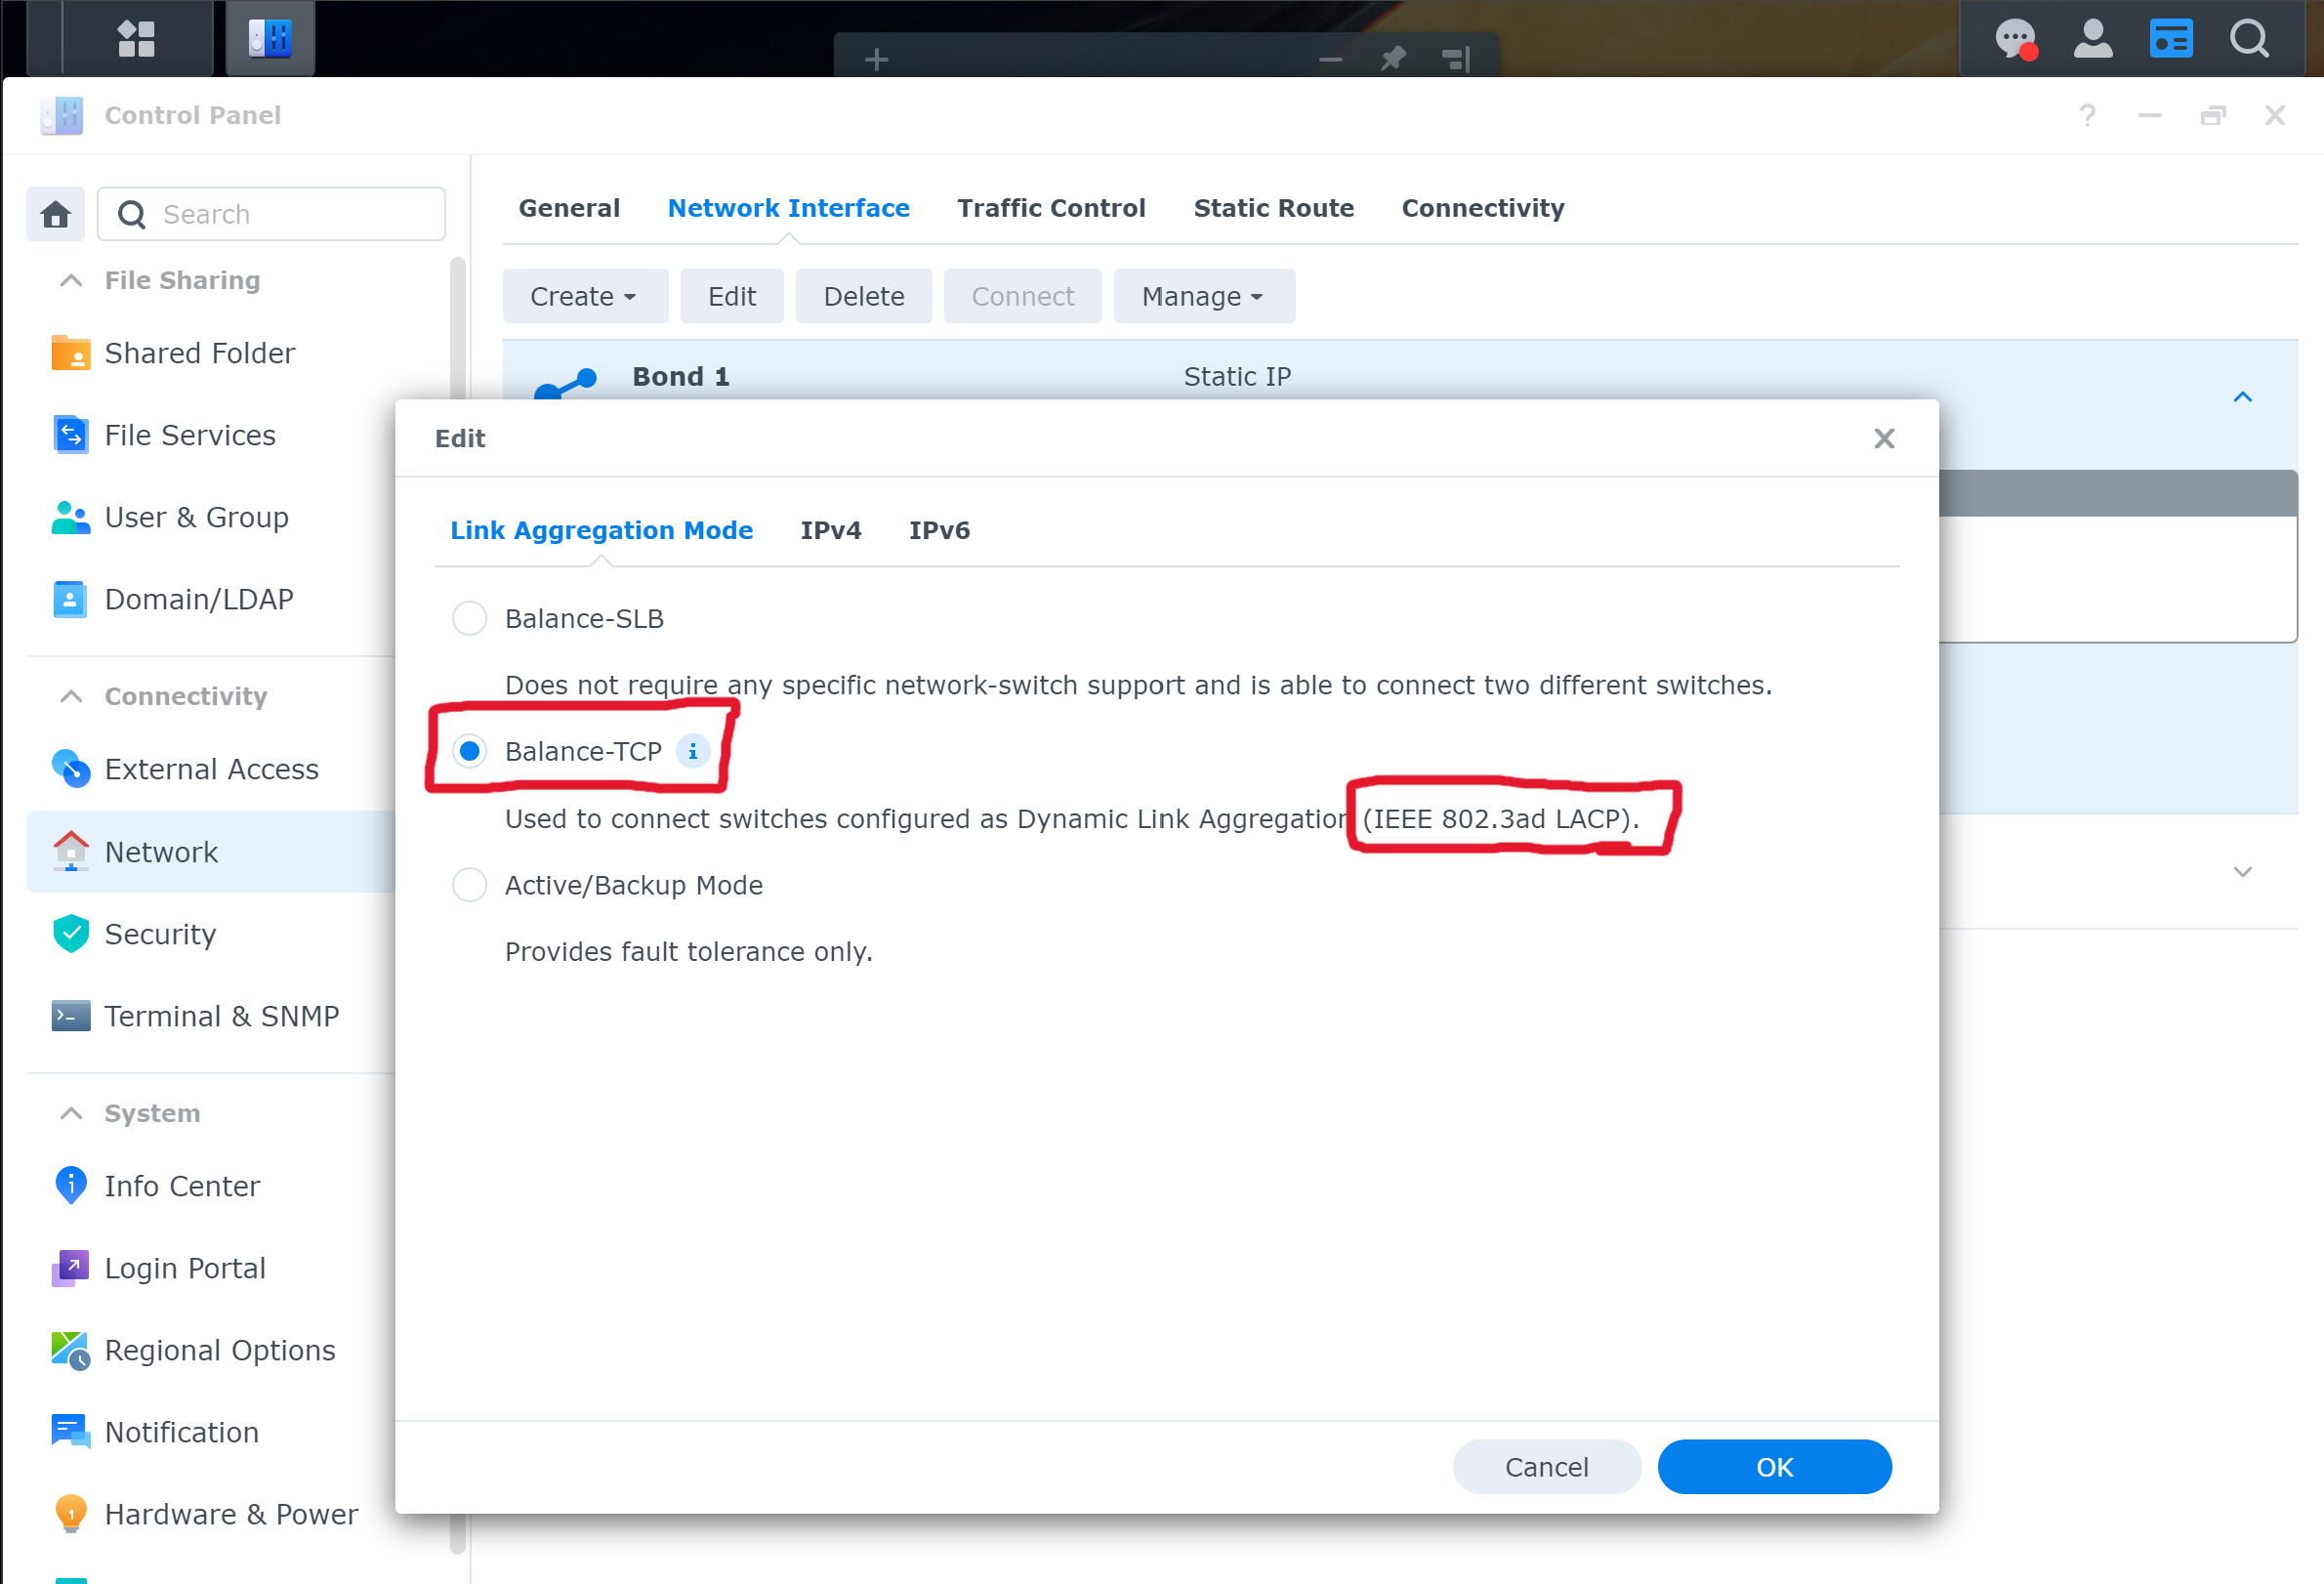
As seen in the screenshot below, enter the Synology NAS portal, to the Control Panel, Network, Network Interfaces, select “Balanced-TCP” also known as “802.3ad” and “LACP”. Click OK. You will lose network connectivity at this point.
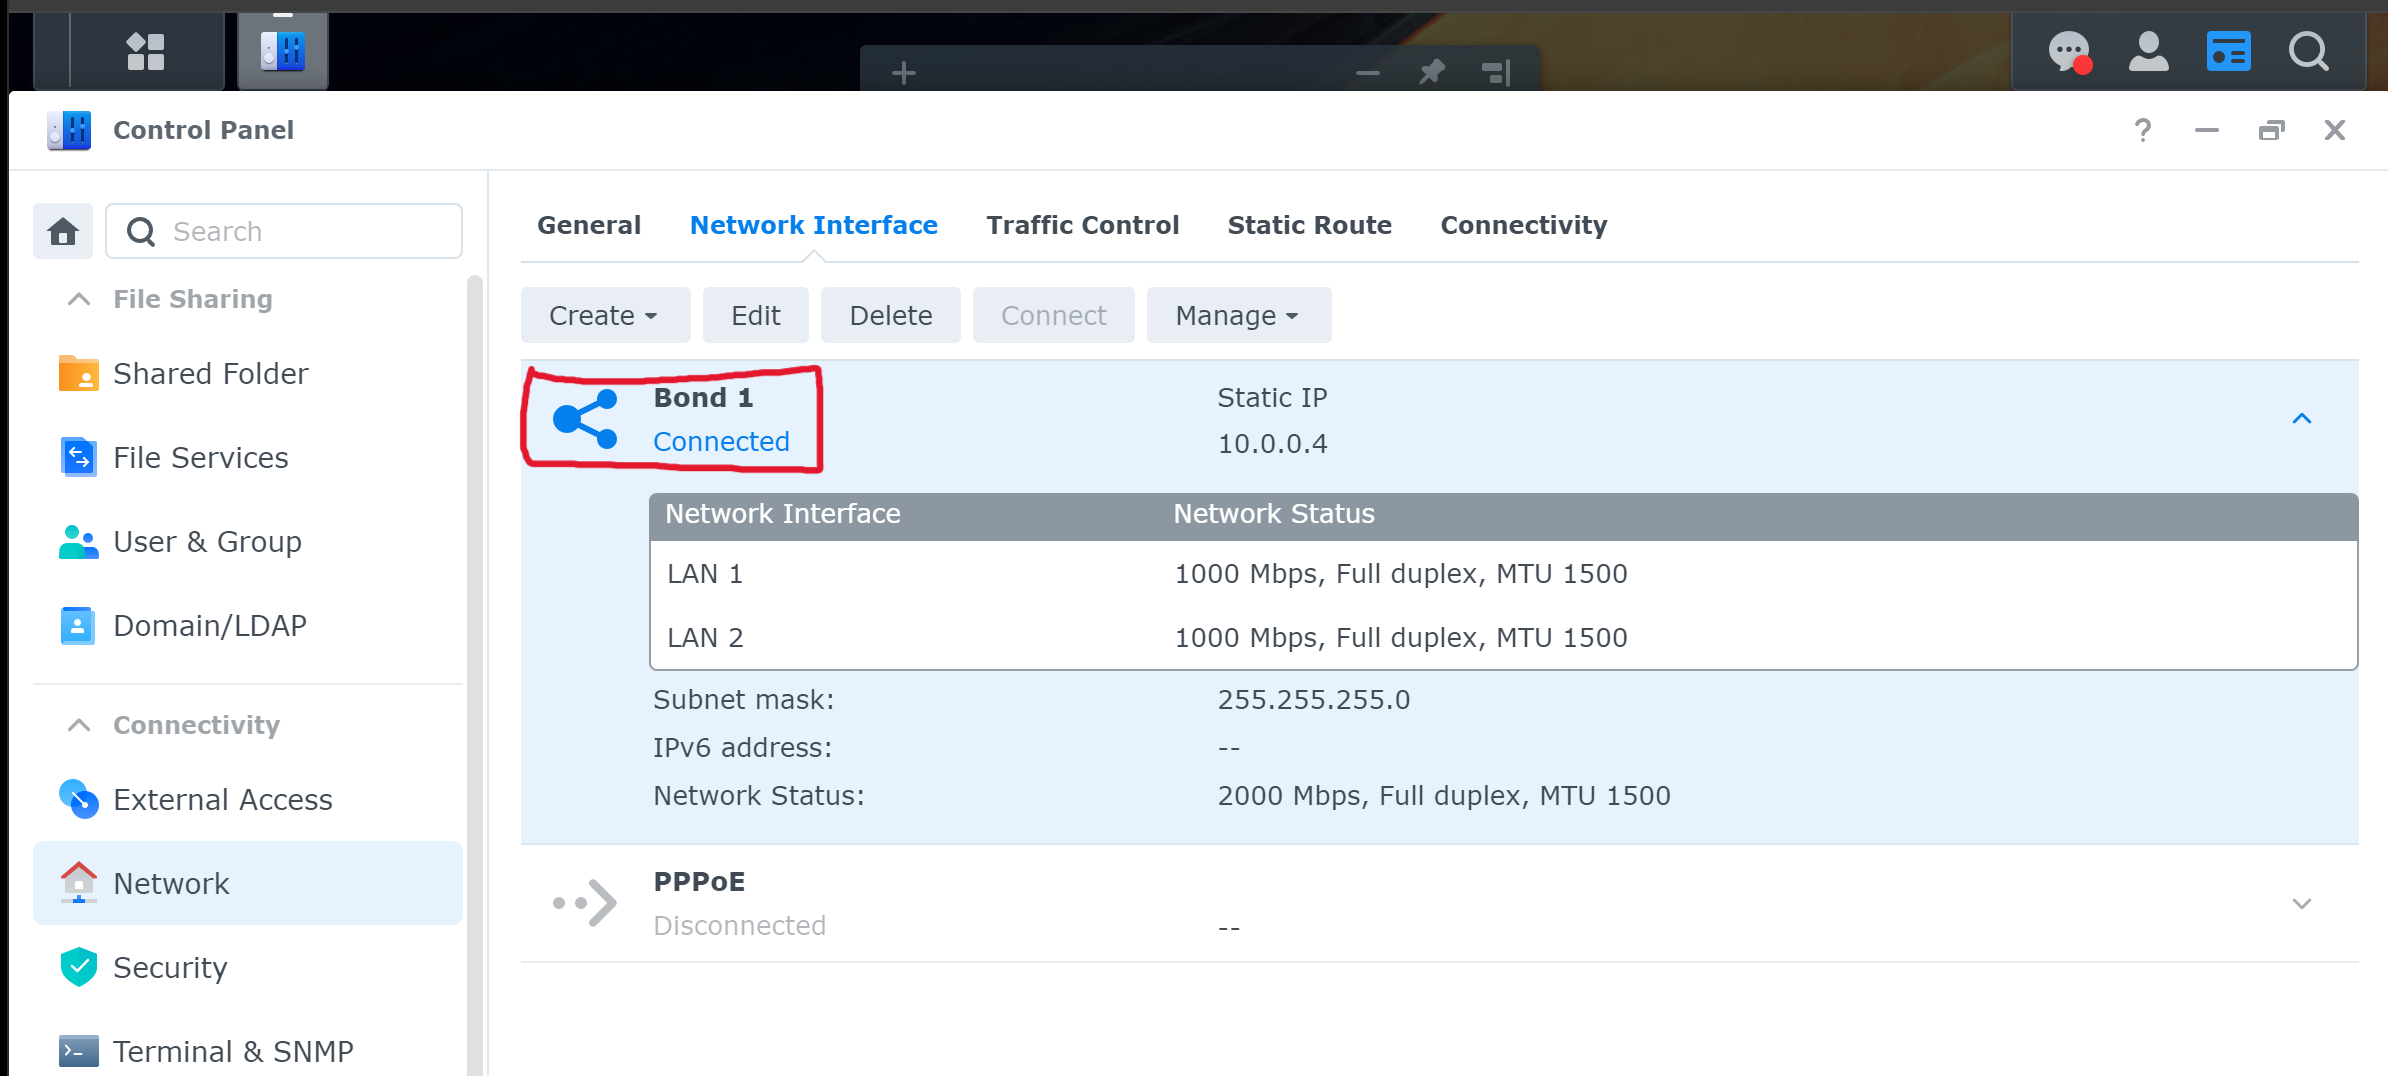
The following screenshot shows how it will look once done.
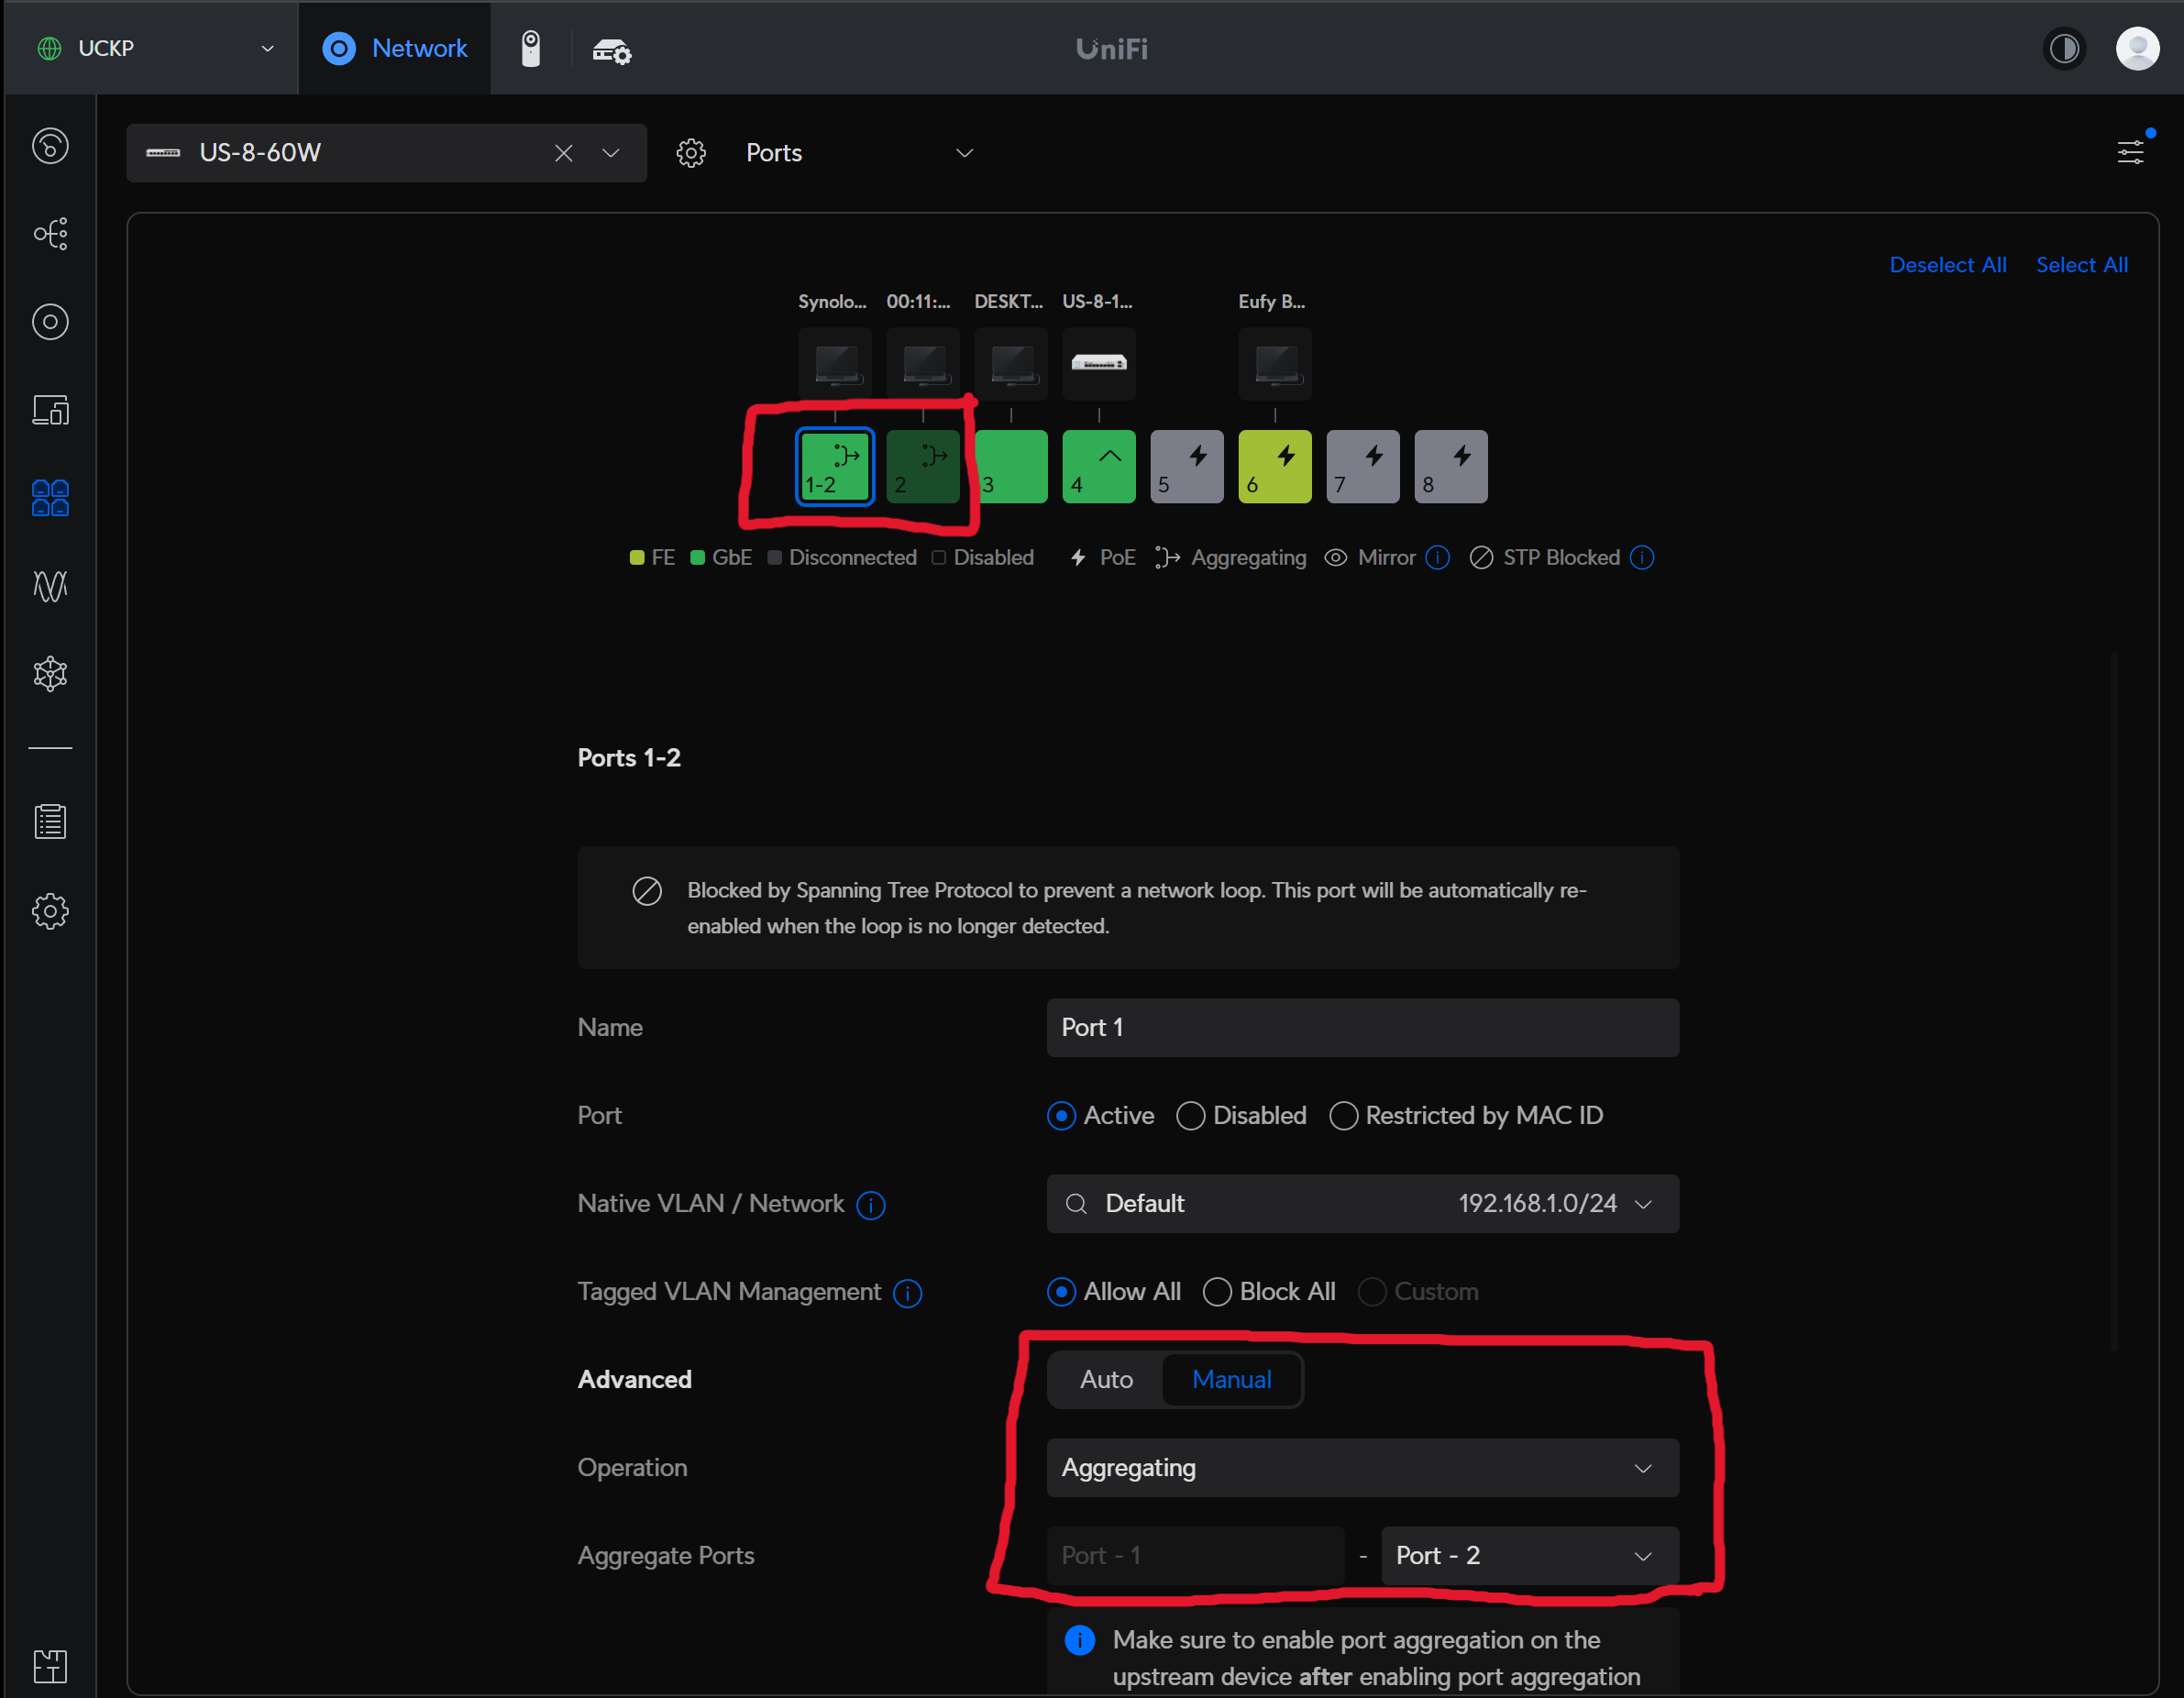
On the UniFi switch, make make sure you’ve connected the Ethernet cables from the Synology NAS to two network ports next to each other. The same applies with more than 2 Ethernet cables. Just keep them consecutive. In the screenshot below, we’re using switch ports 1 and 2.
On the UniFi switch: Enter the portal, go to the switch and select the Port Manager. Select the first switch port, change the “Manual” and change the mode to “Aggregate”. It will select a default additional port to use. In my case it’s switch ports 1 and 2. You can’t skip ports. If you select 1 and 3, 2 is implied and included.
At this point you should have connectivity to the Synology NAS again, and you’re done.
