
Getting a transparent proxy up and running can be troublesome especially getting it to terminate the HTTPS (TLS) connection, inspect it (if need be) and re-terminate it. Most businesses these days don’t want to actually inspect the traffic but can’t go without some-kind of internet monitoring so a minimalistic transparent proxy seems to be a nice fit.
The ability to let 99% of traffic through, block obviously bad content, and then log the traffic for later review. That’s what most businesses are doing these days.
Before we get too far into this, a word on architecture. The only way this will work is if the pfSense is already or going to be your default gateway or is in a position where traffic will pass through it as a router – not just a proxy. The pfSense will take packets routing through it with destination ports of 80 or 443 and redirect them to the traditional proxy port.
The risk of losing connection to your pfSense web portal is low. I note that here because you probably manage the pfSense on port 443 and you’ve probably come to the conclusion that if you manage it on 443 and we’re going to be proxy’ing on that port, how will you maintain your connection to the pfSense? Glad you asked. The pfSense is smart enough to only do redirections of packets that have a destination other than its self. We’re safe.
We’ll need a CA configured. If you have a scheme already in place for your business/home, you’ll probably need to use that in-place of what we configure here. But follow along anyway as a CA is needed before we can allow the Squid proxy to intercept HTTPS traffic.
Go to System, Cert Manager, CA’s. Click Add. Configure your CA to be similar to the following but adapted to your needs.

Install the “Squid” proxy package. Go to System, Package Manager, find Squid in the list and click Install. You’ll then see Squid in the list of installed packages.

Go to Services, Squid Proxy. Go to the Local Cache tab. Go to the bottom of the page and Save.
Go to the General tab. Tick the box to enable Squid.

Tick the box to enable HTTP transparent proxy services.

Tick the box to enable HTTPS (TLS) transparent proxy services.

Enable logging locally. In the real world you’d likely enable this for remote logging (to a remote syslog server).

Save the changes. You should now have a working transparent proxy. However, your web browsers will error as they don’t yet trust the CA.
At this point we need to export and trust the CA certificate that we created at the start of this walk-through.
Go to System, Certificate Manager. Click the “Export” icon that looks like a star to the right of the CA we created earlier.
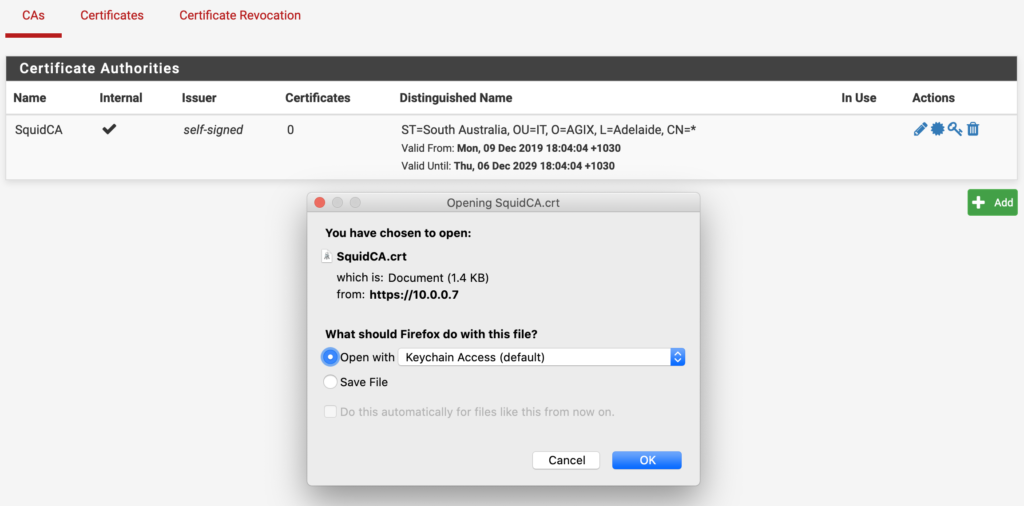
Take that certificate and trust it. For me (on my lab) I simply imported it into my Firefox browser. But in the real-world, you’d either a) use Group Policies to apply it to all machines, or b) use your existing internal CA’s certificate which is probably already trusted by your workstation.
Some websites don’t work well if the connection to them is intercepted by a transparent proxy. Banks commonly have issues with this. The Squid proxy allows for exceptions to prevent these sites from being included in the interception scheme. You can add exceptions based on the destination (websites, etc) and/or the source (workstations in your business).
TIP: You can use IP addresses, subnets and/or domain names. For example, the destination might be “nab.com.au” and the source might be “192.168.0.0/24”.
Go to Services, Squid Proxy.

Save your changes and you should find the exceptions are working.

Very useful post in plain English I can understand. Thank you!