This article discusses the pfSense Netgate VLAN Trunk configuration. We’re using the Netgate 7100 as the firewall appliance, and a TPLink T2500G-10TS (common and fairly generic) switch to form a Trunk between. We have a computer on each side of the Trunk, each in a different subnet. See the diagram below.

CONTEXT: We’re expecting to configure a network with two VLANs; VLAN 40 and VLAN 50 accessible from both sides of the firewall. We expect that the two workstations in the diagram above can communicate with each other. In-fact, when we’re done, depending on which switch interface the workstations are connected to, will determine their VLAN association.
INTERFACES: We’re using the Netgate 7100 onboard 8-port switch only. We’re not routing out to the Internet, and we’re not using the SFP+ ports. Actually I wanted to use SFP+ but the Netgate 7100 and the TPLink available for this lab don’t support each others link speeds. This could be a DAC cable issue, but I am not sure. I expected the Netgate 7100 to downgrade to SFP (not +) which is the only SFP speed supported on this TPLink switch, but that didn’t happen.
TIPS: If you get different results (issues), try: Make sure you’re default gateways (and routes) are correct on the workstations (whatever you’ve set on the workstations or in DHCP). Consider disconnecting from any other network while testing – including the Internet. This can help solve routing issues when you have multiple routers out of your LAN. Try disabling the SFP+ ports or removing them completely from the Interfaces->Assignments (assuming you’re not using them).
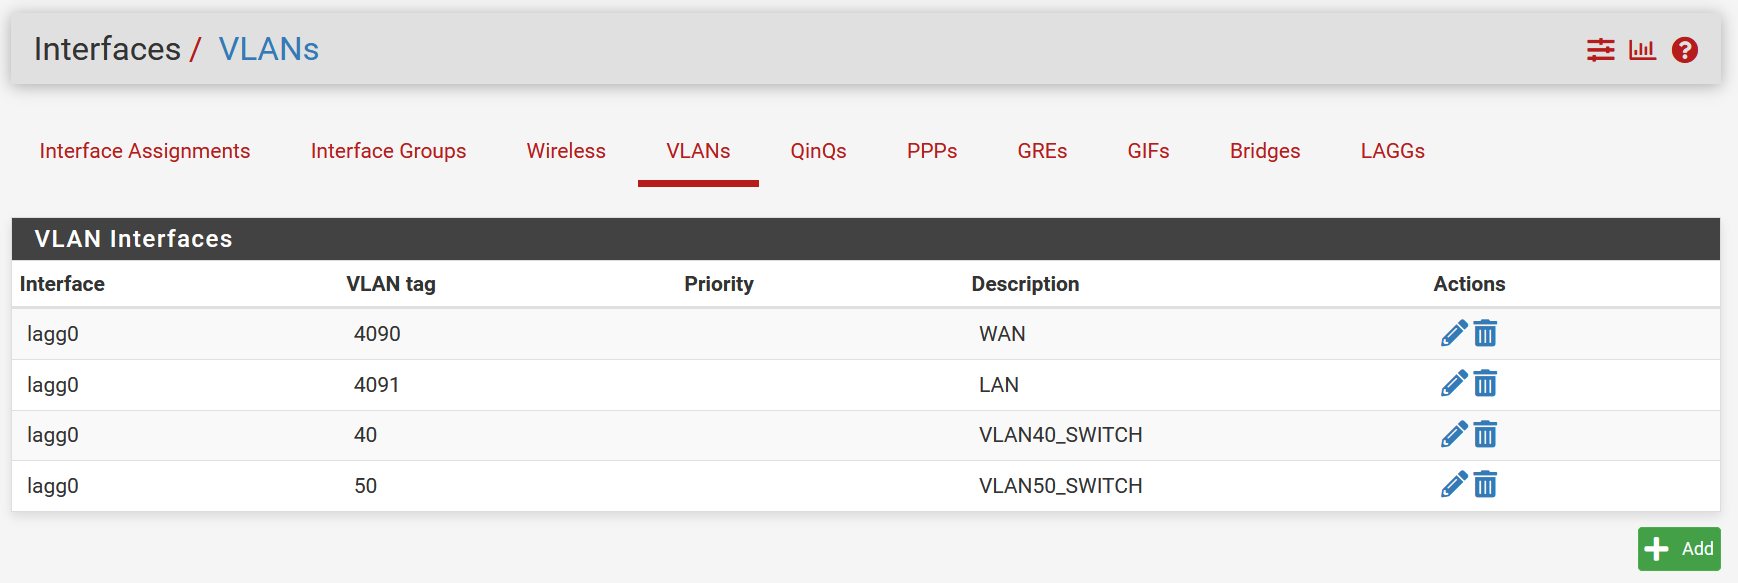
We’ll start with the pfSense configuration. Create the VLANs that you need. We’re creating two VLANs; 40 and 50.
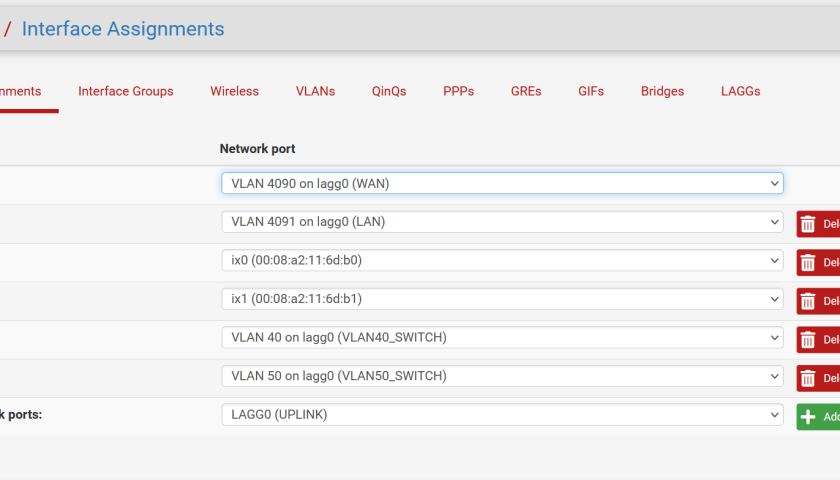
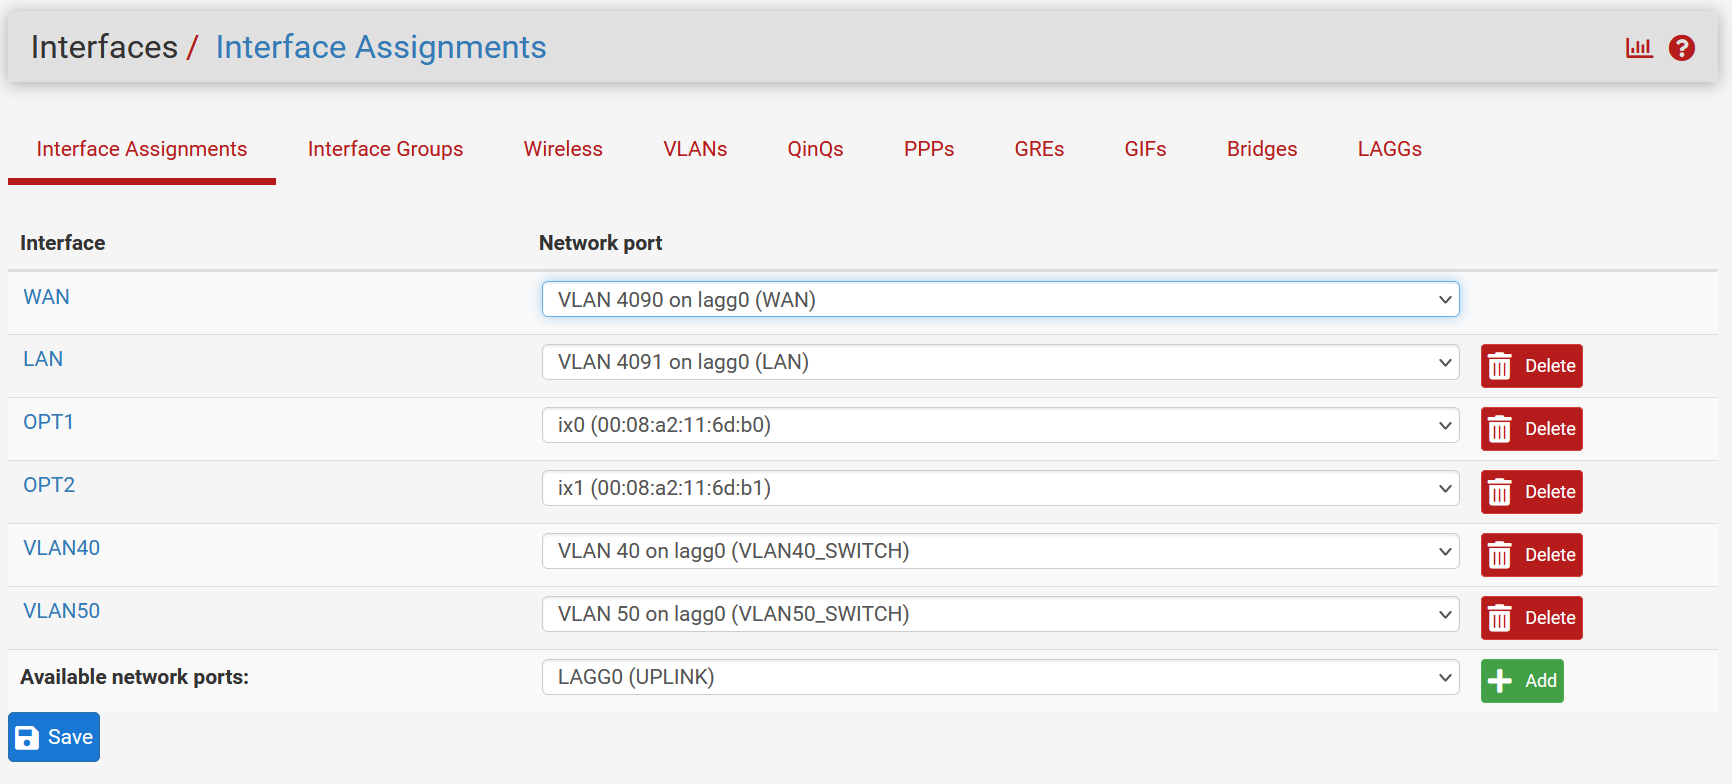
Add the new VLAN interfaces. I’ve changed the default “OPTx” names to be VLAN40 and VLAN50. I’ve also configured them with IP addresses. I’ve not showed that here but obviously they’ll need IP addresses. I’ve gone with the scheme of “192.168.50.4/24” and used the third octet for the VLAN number (VLAN50). This naming scheme is not a requirement.
IMPORTANT: Make sure you allow packets in in the firewall rules for the two new interfaces you’re creating below. If you don’t do this, packets will not travel from one VLAN to the other. Also make sure you have DHCP being offered from “somewhere”. Either the firewall or another DHCP server, or configure pfSense as a DHCP relay. That’s not covered here.
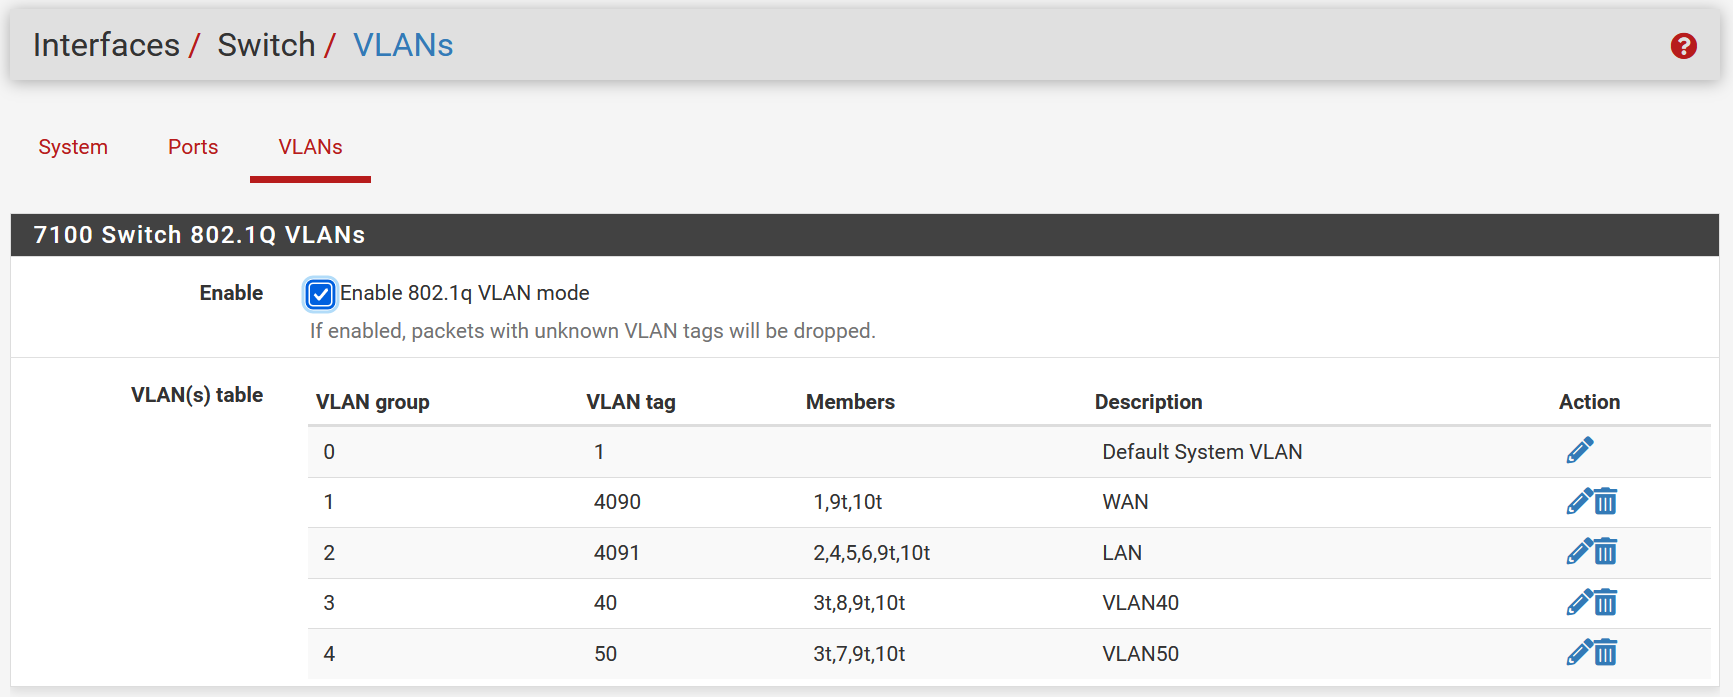
Make sure to set the default tagging for any inbound frames that don’t have a VLAN tag. For this example, we’re assigning VLAN 1 to any inbound untagged frames on the Trunk port. We’re using interfaces 7 and 8 as our switch ports for end-point devices (our workstations). Anything plugged into interface 7 will end up on VLAN 50. While anything plugged into interface 8 will end up on VLAN 40. These workstations need not be aware of VLANs at all.
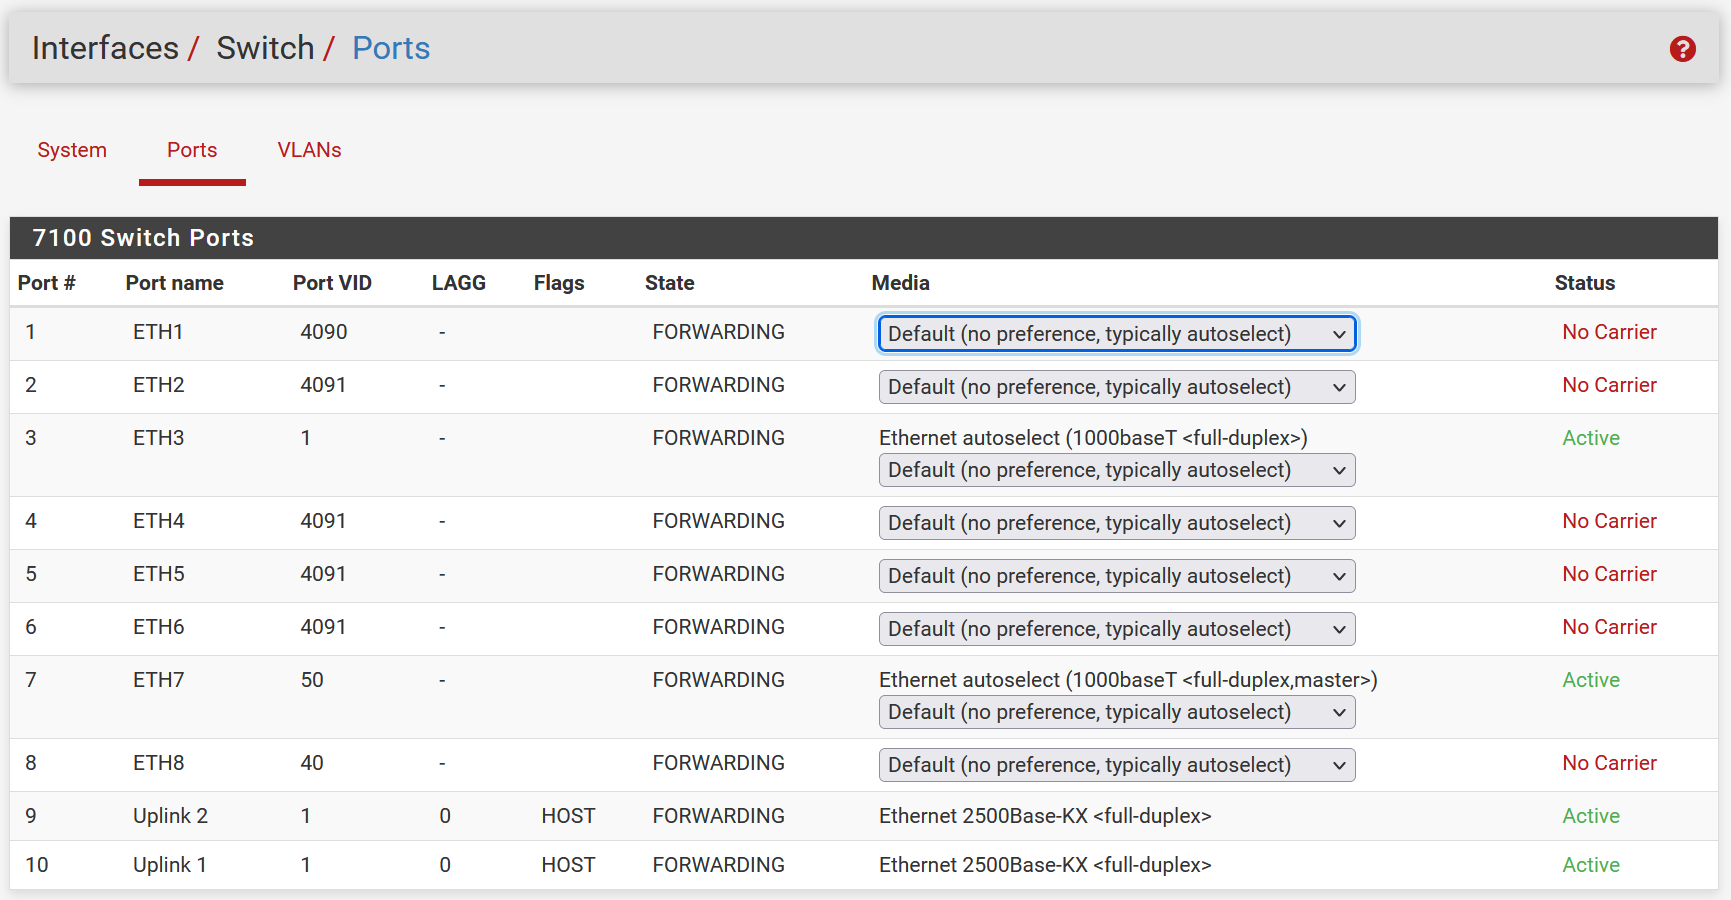
We designate one interface on the Netgate as the VLAN Trunk (run a cable from that interface to the other switch), then assign each VLAN to the trunk interface. Pay attention to the “t” next to the interfaces. That “t” specifies that the given interface should be tagged with the specified VLAN ID.
In this example, we’re using interface 3 (eth3) as the Trunk. Therefore we’re including that in each VLAN that we want to include in the Trunk, as you can see below. For instance, VLAN 40 is being tagged on interface 3 (ignore 9 and 10, they’re the LAGG). And VLAN 50 is being tagged on interface 8. Notice interface 8 is untagged on VLAN 40, and interface 7 is untagged on VLAN 50. That’s because we want these to be “access ports” which don’t trunk, they expect a workstation or non-VLAN’ed switch (for example) on those interfaces.
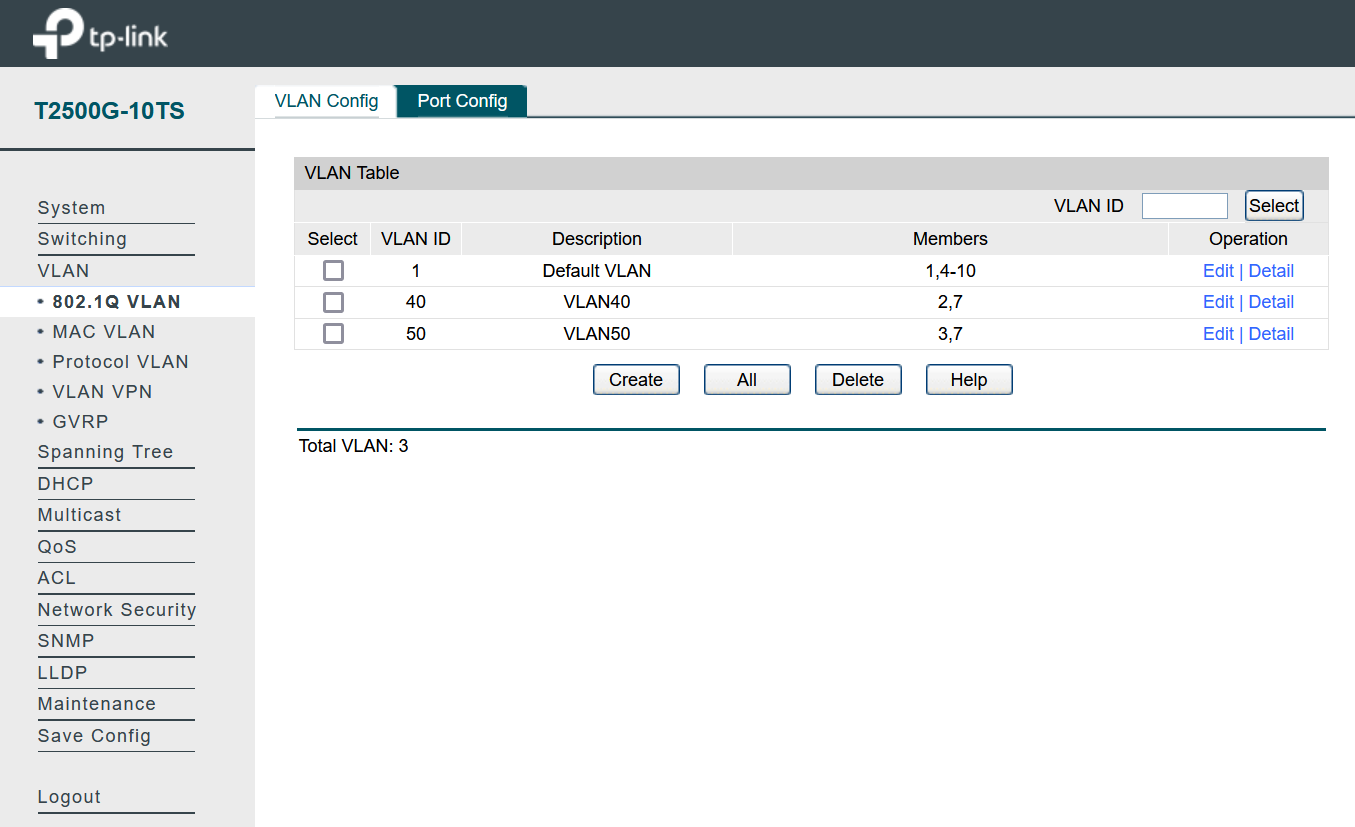
Now we configure the other switch. In our case we’re using the TPLink switch, but you could use any switch that support 802.1q VLANs.
In this example, we’re using interface 7 as the trunk. The screenshot below shows our VLAN 40 configured. Ie, we’re assigning an interface, and we’re also tagging it on the Trunk interface. Do the same for VLAN 50 but designate a different interface for that – such as interface 3.

The following is a summary screenshot including the Trunk tagging for both VLANs 40 and 50.
At this point (assuming you have DHCP configured, otherwise set IP addresses manually on your workstations) you should be able to add workstations to either switch (on the designated interfaces) and communicate with workstations on the other switch. The Netgate will route between the two VLANs, the TPLink has no understanding of routing and packets will be forwarded (switch) to the Netgate for routing.
