This article explains how to manually disable weak TLS versions on Windows systems. Make sure you have a backup or recovery option as we’re making changes to the Windows Registry.
Open the Registry and head to:
Computer\HKEY_LOCAL_MACHINE\SYSTEM\CurrentControlSet\Control\SecurityProviders\SCHANNEL\Protocols
Right click on “Protocols” in the left column, and select “New” -> “Key”. Give the key the name “TLS 1.0”. Do the same so there are keys called “TLS 1.1”, and “TLS 1.2”. If you want to disable “TLS 3” as well, create a key for that too.
Right click on “TLS 1.0” in the left column, and select “New” -> “Key”. Give the key the name “Client” and then do the same for the key “Server”. Do the same for the other TLS keys. See the screenshots below for clarification.
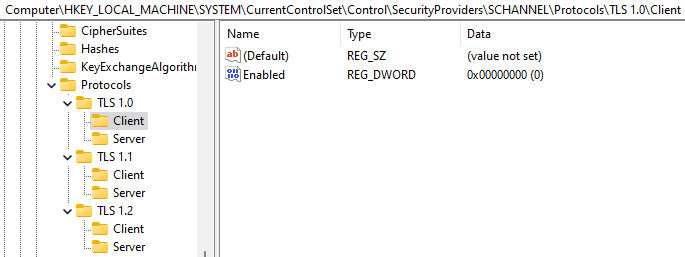
In each of those keys (the “Client” and “Server”), go to “NEW” -> “DWORD (32 bit) Value”. Give the name “Enabled” and set the value to “0”. (Except for TLS 1.2, which we set the value to “1”).
See the screenshot below for a visual example:
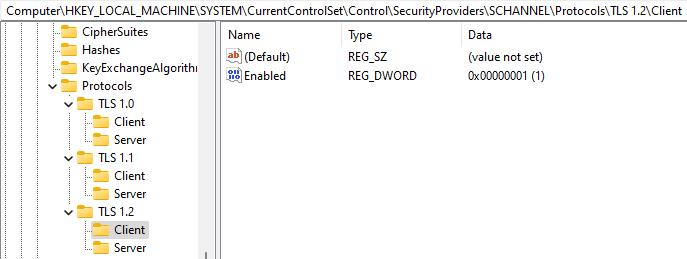
For TLS 1.2, we do the same except that we set the “Enabled” to “1” for both the “Client” and “Server”. See the example below.
At this point we need to reboot the computer. Again, make sure you have a backup to revert to, or a snapshot or some other recovery plan. Just in case.
